
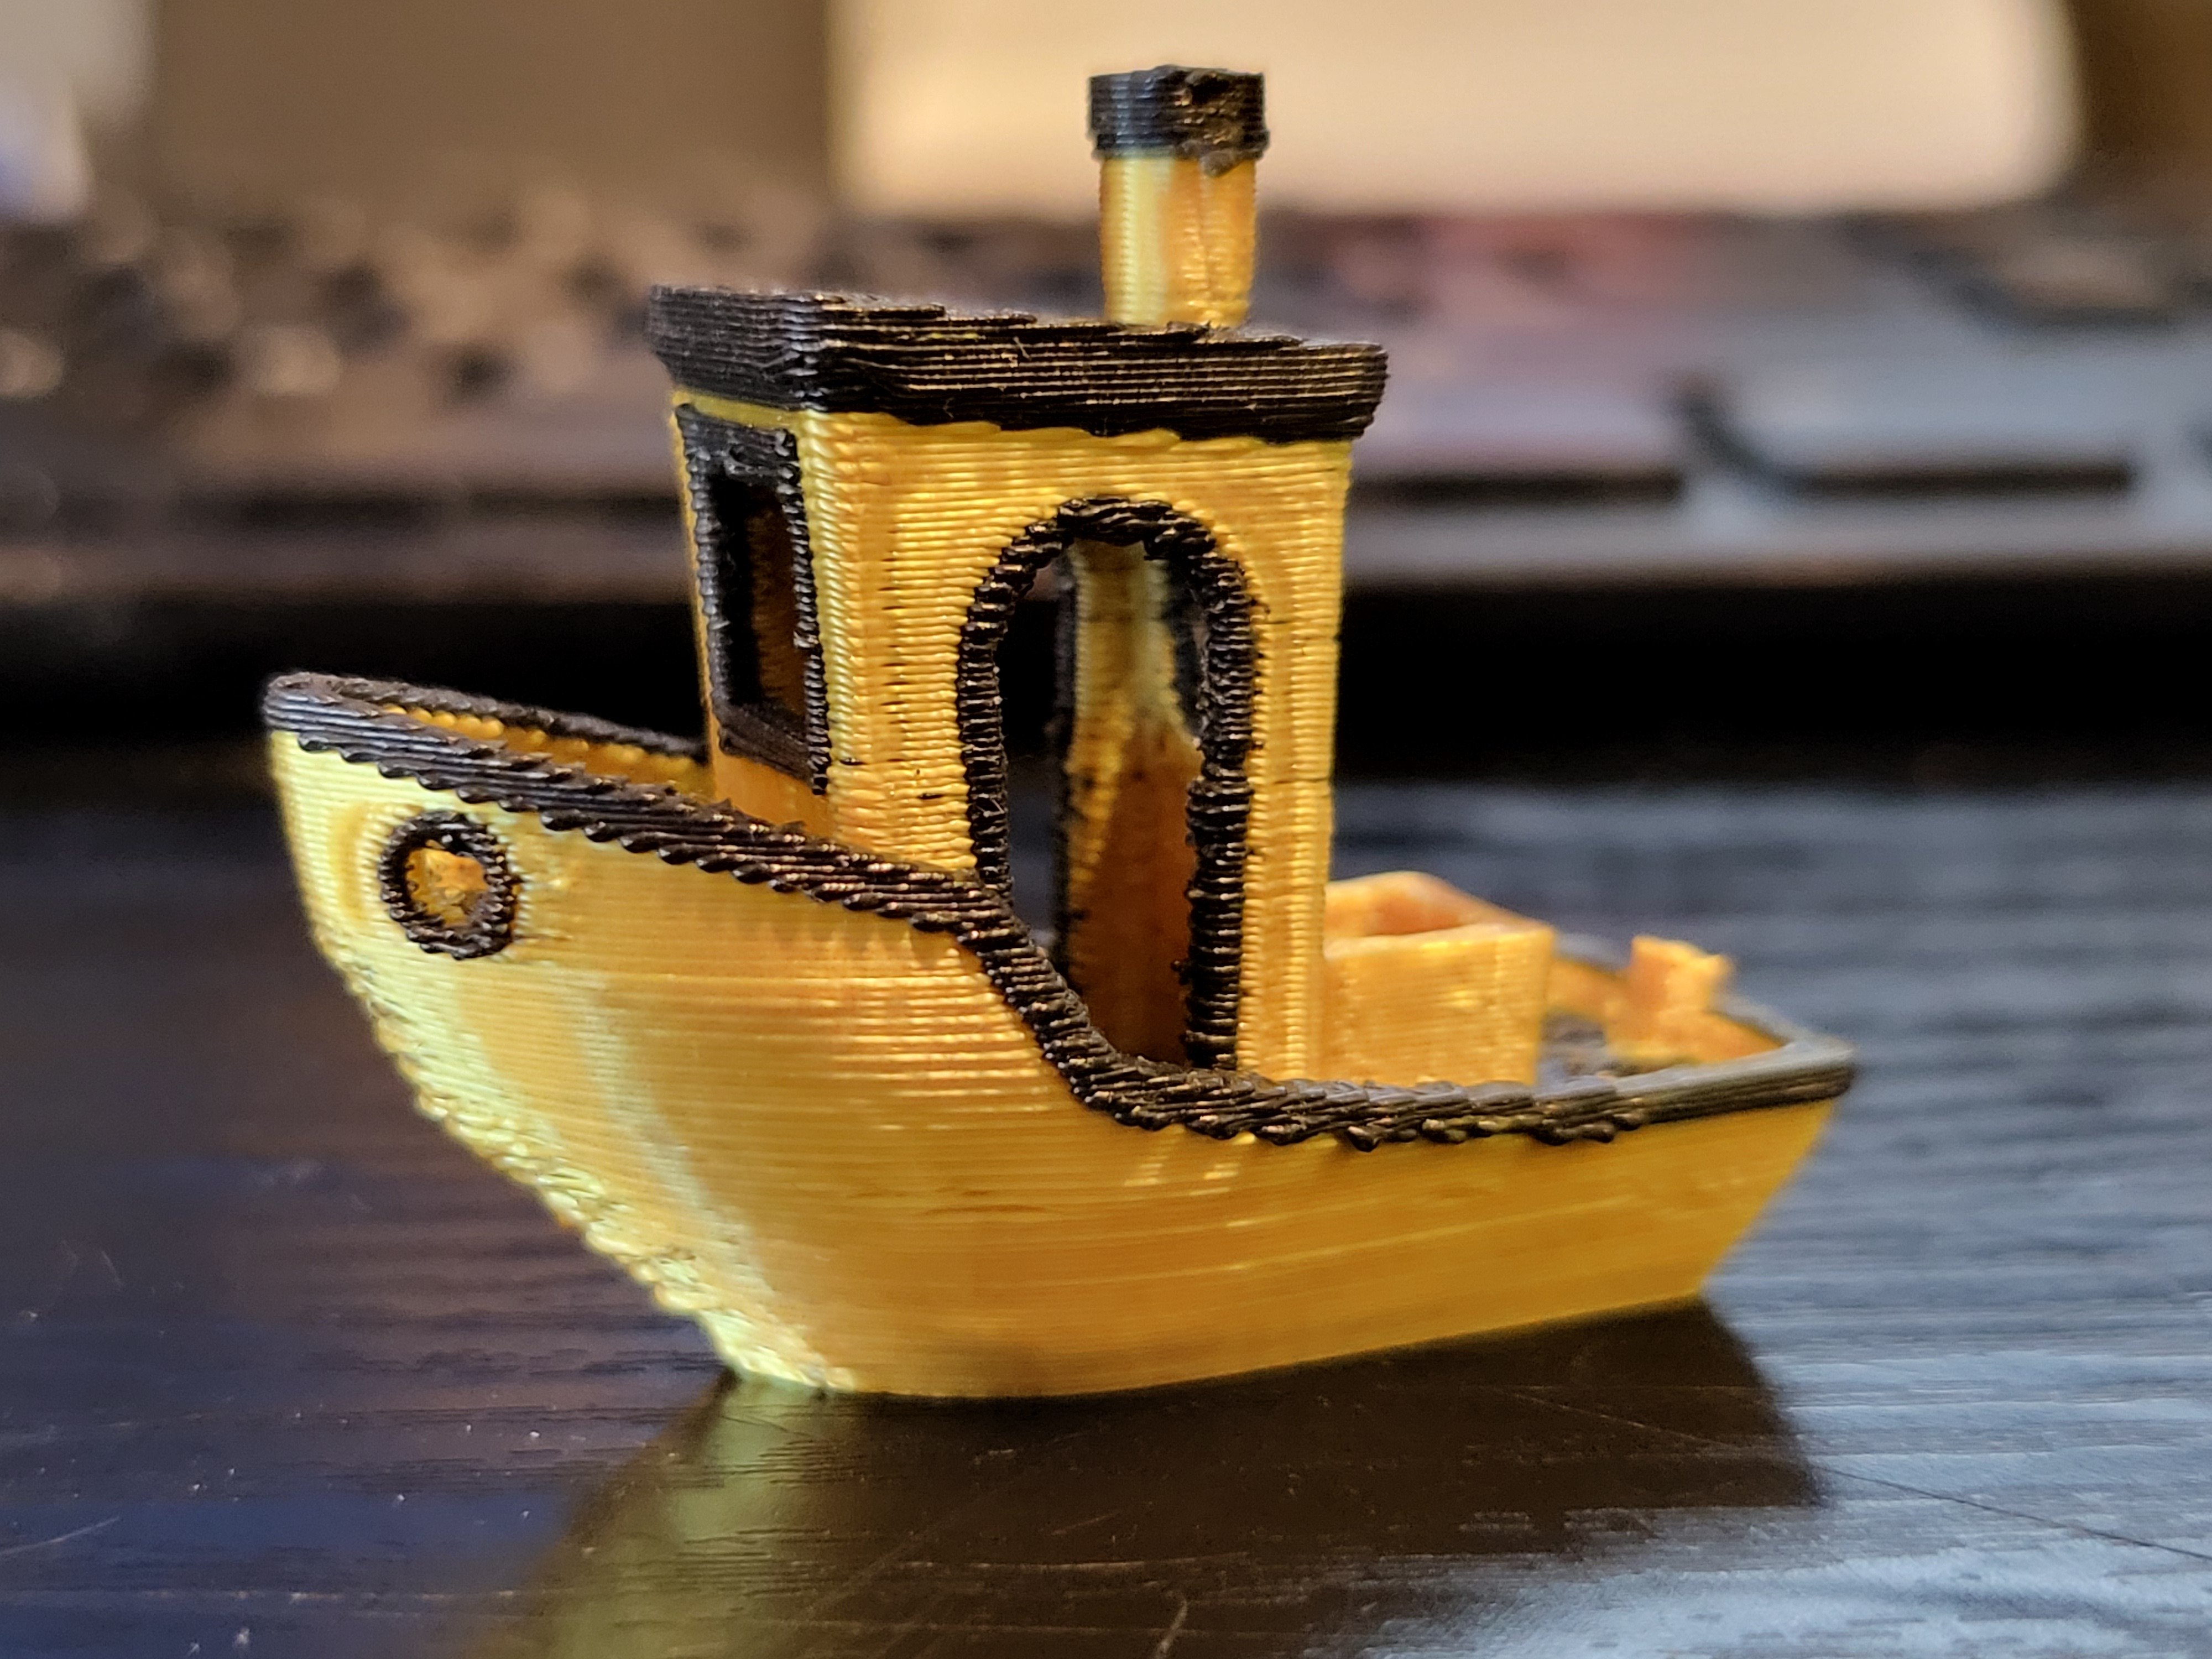
I finally got multi-color working on my Creality K1 Max using the 3D Chameleon.
Decided to make a 2 color benchy and scaled it down to 75% to save time, along with 0.25mm layer height.
So far the Chameleon has been pretty picky with filament, but when it works it works well! This print is with silk gold and matte black. I have even gotten 95A TPU to print with it surprisingly!
I modified the color-change code so it takes 1 minute less, which makes a big difference when you have hundreds of color changes.
Next up, 4 color benchy. Probably will be 10 hrs lol
The multi color is neat but that print quality… woof
and this is coming from someone who daily drives an ANET
Yeah it’s not the prettiest lol. This is 75% size, and 0.25mm layers, which doesn’t help. (I just wanted to shorten print time)
I had to use Prusa Slicer because of the custom GCode features, so my settings there are not perfect yet. It also isn’t controlling the aux fans properly like Creality slicer.
My normal 1 color benchies are 22 minutes and absolutely perfect, using my finely tuned Creality Slicer profile.
How do you like your ANET? Is the A8?
Four hours? That seems awfully slow. You say you’re printing this for your store? I would think you’d want to get a Bambu A1.
Color changes are VERY slow.
1min30sec for every color change. Multiply that by hundreds of color changes and it adds up!
I am starting to see why people usually print whole plates full of multicolor prints. It’s the same amount of color changes, but more way more efficient.
no, this was a print for myself to test the Chameleon. I don’t sell any multicolor prints as of now.
I prefer non-proprietary parts and unlocked software you get with a rooted K1. I can edit my klipper configs directly.
This is not my multicolor-specific machine. It will be used mostly for single color regular prints
Ah I see! Did you see Bambu has an open source-ish option now with the community firmware?
Yeah that is pretty cool how Bambu is dealing with it too, but not the same as having full root access to the Linux computer that runs the printer.
I can SSH into my K1 and change things, install programs, etc. I even changed my Start_Print sequence to stop doing all the time-consuming calibration for every print. Sometimes I am just prototyping and dont want 10 min of calibration for a 3 minute print.
I hear you on that. I ended up getting a Qidi Max 3 for that reason.
Or just well tune your printer. Bambus are fine for people who can spend more money and use proprietary software but will spend less time tinkering.
They have community firmware now and the A1 is $550 bucks with AMS that has no printer poop for multi material. Not that it matters to me, I just grabbed a Qidi X Max 3 for the print volume (and because it was open-ish Klipper).
Elegoo Neptune 4 is $220
A1 is recalled isn’t it?
I also need the large size, otherwise might have gotten a P1S
A1 mini is recalled
A1 technically is as well. But if you have one that isn’t affected it’s not a huge deal.
Oh good to know. I do think as a toy printer for your kids, the A1 mini looks great. And assuming you have kids, then you don’t have time, making the premium price more attractive.
Lol I know people love to hate on Bambu, but mine came out of the box working pretty much perfectly and has been an absolutely incredible printer. Quality far better than anything else I have seen without a lot of extra work on a printer.
Oh that’s sick! I’ve been interested in the chameleon since they first posted on Reddit. How finicky is it?
very. I spent the last 3 weeks fiddling with the timing. If you are not willing to troubleshoot and work on it I’d go for a ready-built solution like the AMS. I like the challenge, but definitely underestimated it
Most of it was me not fully understanding what was happening in the filament swap gcode. Once I understood that I was able to tweak settings to make it work. Once I found out certain filaments are just trouble I have had better luck. Still working on getting it to be less picky.
the updated version in April is going to have sensor-less detection of where the filament is in it’s path, which will make timing a non-issue. Any Chameleon sold until then will have the hardware needed, and can be updated for free in April. can’t waiit
Oooh, that sounds awesome! I need this.
I thought this was going to be a joke where you hand-drew the bench with a filament pen, thought it was really good for that.
Nope. Wow, that took a while.
I misread and thought this was a 40 meter benchy.
How do you like the K1 Max? I’m considering that one for my next purchase, upgrading from a heavily modified E3v2. Any downsides or things you wish you would have known first? Any other recommendations? I am mostly satisfied with my ender, just looking to get some speed and stability gains and maybe higher print quality by moving to CoreXY/Klipper system. Ender was a great, cheap way to teach myself, but now I’m looking to step it up just a bit. Thanks.
Overall I love it. If you are into tinkering, which it sounds like you are, you’ll like it.
My K1 is about 4x faster than my modded ender 3. I print at 420mm/s max speed on my K1 with 20k mm/s2 max acceleration. It is amazing how fast things finish. Overnight prints are now day prints.
You can get near-perfect prints out of the box, but will want to do some calibration to get better results. There are built in calibration tools in the Creality slicer. There is a VFA problem, but it seems to go away if I print walls above 220mm/s. Printing with polycarbonate is now fully possible and I love it. I print most replacement parts for the printer in PC.
being able to use volcano nozzles is way better than anything proprietary. They are dirt cheap and you can get them in all different sizes.
This thing is fully able to be modded, which I love about it. I’ve added:
- second side aux fan
- lighter printed hotend housing
- side-spool mounts
- tramming bed knobs
- 270deg door hinge
- lid-riser with LED strips inside
Thank you! That’s very helpful!
Do you have to use creality slicer or can it still work with Cura or Prusaslicer? And can I still use octoapp to watch/tune from my phone? That seems to be the biggest drawback I was able to sus out of their marketing materials is that it seems to be a lot more locked down to the creality ecosystem than prior models, I’m hoping that’s changed or I was just interpreting it wrong.
Thanks again, appreciate the insight!
You can use any slicer you like. I have mine connected to Cura, Creality and Prusa slicers with the ability to send and start a print right from the slicers.
I never once set mine up with their Creality cloud app, you can skip that during setup and just do LAN and USB prints.
The key is to root it, which is really easy, then you can install Fluidd and have way more control during prints. You can even change your pressure-advance on the fly. There are tons of mods you can do after rooting such as these
from the looks of this post you can now use octoeverywhere on K1 printers
That’s great, thanks so much! Pretty much seals the deal for me.
Just don’t pay MSRP! They often go on sale for $700. Got mine for $680 before tax!
If you do pull the trigger, here is my Creality slicer profile for quiet, yet fast, printing
Dude, you’re awesome! Yeah I actually just saw that Microcenter has them for $699 rn, matches full retail for the Bambu P1S and $100 cheaper than the Prusa Mk4 self-assembled kit, which are the other two I’ve been looking at. Pretty sure my search is over.
I don’t think you’ll be disappointed. The size of the max has been useful already. did 298mm tall print that would be impossible on those printers. Literally printed myself some small trash cans lol
If you don’t mimd me asking, what practical use case for this is there? Like it’s cool but I just split the model up and print them separately and it seems like so much less of a pain
Depends on the model. Sometimes printing separately is better! Sometimes printing together is better. It depends on the geometry. For example, if one color can act as support for the other. Printing materials on each other can be better bonding, too. It’s also better in a high volume sense to have the machine do as much work as possible.
If you print with incompatible filaments (materials which don’t bond/adhere) you can get cheap, nearly perfect breakaway supports. I’ve done some rocket parts on my PrusaXL and it’s certifiably magic.
yeah I saw people were doing that with PETG and PLA. I haven’t tried it yet but good to know that’s in my back pocket if I need it.
Also soluble supports are a thing, although they might be trickier and more expensive
good question, this was just a test print honestly. My main use case will be doing TPU and PLA for phone cases for my store. Soft inside, hard outside. The tests I have done have the two materials completely fused together and are promising.
most full color prints can, and should, be printed separately and assembled later. I totally agree there, but there are times that isn’t ideal.
I made a print that was a dial and small numbers with markings. This would have been a pain to glue 1.5mm wide pieces onto the main part. Multicolor printing made it super easy and the result is clean looking.
I’ll probably print mostly single color, but I love having the flexibility
Ah, I hadn’t thought about integrated multimaterial, nice
New Lemmy Post: 4hr 40m Benchy! (https://lemmy.world/post/11714460)
Tagging: #3dprinting(Replying in the OP of this thread (NOT THIS BOT!) will appear as a comment in the lemmy discussion.)
I am a FOSS bot. Check my README: https://github.com/db0/lemmy-tagginator/blob/main/README.md


